Happy Halloween! We just survived our first Halloween in our new neighborhood where we had about 200 trick-or-treaters come to our door (compared to less than 20 at our old place). We ran out of candy, and the last two kids got granola bars! (Peanut butter chocolate chip granola bars, so they're almost candy ;o)
So here's the final installment from Raevn's Nest Art Retreat. Last Saturday, I took an all-day workshop with Richard Salley, learning how to make this copper locket. (If you click on the tutorial sidebar on his website, you'll find a very similar project.)
I don't have a lot of experience in working with metal and wire beyond making a few charms, reading a bunch of books and watching Jewelry Making on the DIY network, so I was excited to learn some basic things, like using a jewelry saw (broke 3 blades cutting that heart shape out of the rusty washer that forms the image frame), making rivets and staples, and shaping copper and then aging it in liver of sulphur. My wire work still needs a lot of practice (those S- and C- scrolls are supposed to be symmetrical), but I learned a lot from the class and went home excited to make more! Now I just need to find the time....
You can click on my images to see a larger view on Flickr. And check out what other folks made:
Kathi took Richard's two workshops on Friday. Fabulous!
Carmi was in the same class as me - I love her take on this project!
Jill sat in front of me, and I was in awe of her skill. She also reassured me that it was normal to break saw blades. (Scroll down to see her work from the Friday & Saturday Salley workshops)
Saturday, October 31, 2009
Thursday, October 29, 2009
Making a (Watchmaker Tin) Scene
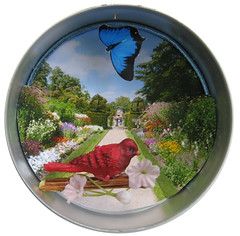
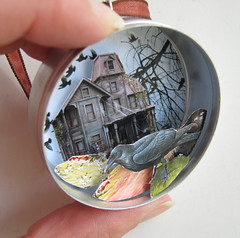
Here's the second installment of my Raevn's Nest Art Retreat experience. On Friday night I took the "Make A Scene" workshop with Jill K. Berry, where we spent two crafty hours constructing mini-dioramas in watchmaker tins. Jill provided all the materials including images sized to fit the little metal tins. The garden scene above is about 2-3/4" while the haunted mansion below is 2" in diameter.
We staggered the layers with hidden beads, head pins trimmed to size, and the power of a high-heat glue gun! It was a little tricky getting everything into place before the glue cooled, but the results are so much fun! The tins do have clear glass lids, but they didn't photograph well with the lids on.
You can see some of Jill's samples on her blog. My friend Mel also took this workshop and made a great George of the Jungle tin, which I hope she'll post a photo of! :D
Tuesday, October 27, 2009
Making 3-D ATCs
I'll be blogging my Raevn's Nest Art Retreat experience in installments. Last Friday, I took the "3-D ATC" workshop taught by Laurie Mika. I've never used polymer clay before (having vowed I was not going to take up any more crafts that involved buying even more supplies), and I was surprised how simple Laurie's technique is.
We rolled out Sculpey III or Premo by hand, stamped it with rubber stamps to create texture and then embellished with acrylic paints, mica powders and doodads, cutting and stacking shapes to make these three-dimensional ATC-sized works of art. My layers were only about 1/8" thick with my thickest ATC being about 3/4" but some of folks in my class made pieces over an inch thick! These were all baked at 275F for about 20-25 minutes or thereabouts. The temperature is low enough that we could include paper images in our pieces, so I used a Rossetti faux postage stamp and some tiny Victorian faces from Ten Two Studios. Laurie provided all these fabulous rubber stamps with words and textures for us to use. And no, these are not available for trade! :D
Here are some other folks who took the class and posted pix of what they made:
Carmi Cimicata
Gary Warren Niebuhr
Saturday, October 17, 2009
Halloween & Day of the Dead projects
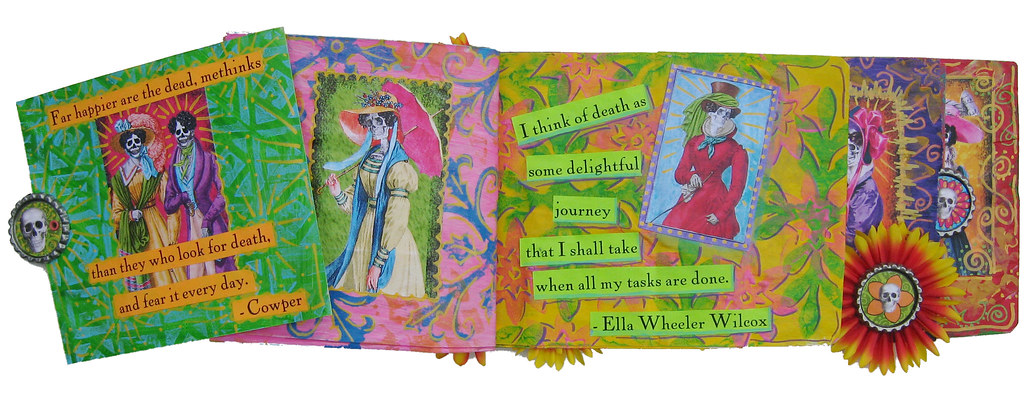
No, I haven't fallen off the face of the earth! My non-art job has been incredibly busy, and then I got the cold that's going around, so I'm moving in slow-motion. But here's what I've been working on. Above is Dearly Departed completed for the Ten Two Studios design team challenge, which I had mentioned last month. I used a paper bag book and colorful Day of the Dead designs from Ten Two Studios. You can see all the pages in my Dearly Departed Flickr set. The book will also be on display at the Bay View Book Arts Gallery later this month for the 2nd Annual "Darkness Falls" show.
If you haven't been over to Ten Two Studios lately, Lisa's been posting daily Halloween eye candy from the design team and others. Kooky & creepy - Be sure to scroll down to see everything!
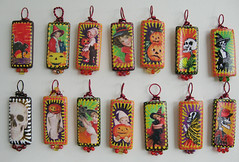
Next weekend, I'm attending Raevn's Nest Art Retreat in Cedarburg, WI. I registered for this back in March, and I can't believe it's almost time! I'm still running around trying to get my class supplies. I signed up for three workshops: 3-D ATCs with Laurie Mika, Make A Scene with Jill K. Berry, and Hinged Copper Locket with Richard Salley. (There are photos of the class projects at the bottom of each workshop page.) I'm also participating in a Halloween-themed charm swap at the retreat, and so I've been working on those (using dominoes and images from Ten Two Studios, of course). This is the reverse side of the charms above:
I'm also working on ATCs for the Milwaukee ATC group's next meeting, which happens to be on October 31, so not surprisingly the Halloween & Day of the Dead theme won the vote. I've been doing a series of Witchy Women, with these fun collage sheets
You can see the rest of the set on Flickr. So that's what's going on here!
Subscribe to:
Posts (Atom)