
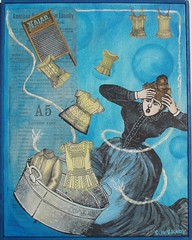
Lisa challenged the Ten Two Studios design team to come up with interesting uses for these small manila envelopes (3-3/8 x 12 inches). I've been trying to figure out how to display some of my ATC collection in a manner that's more interesting than just pinning them to a bulletin board but would also allow me to swap them out fairly easily AND accommodate both portrait and landscape formats, as well as some slightly chunkier cards that don't fit in standard sleeves. So here's what I did with the envelopes, some acrylic paint, transparency plastic, brads, and wooden paint stirrers. (I suppose the vintage hanger is optional but so much fun!)
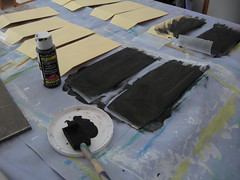
First I decided I didn't want my envelope decoration to be too busy, since this would distract from the ATCs, so I just painted them basic black. I considered priming the envelopes with gesso but was too lazy, and they turned out fine without it. I slid pieces of wax paper inside the envelope when I was painting them just in case the paint bled through and stuck the two sides together, but it didn't happen. So yeah, just slap some paint on those suckers! (Or ink or crayon or whatever.) I originally considered painting both front and back of the envelopes, but then I thought about the black paint rubbing off on our nice white wall, so I only painted one side.
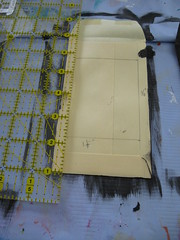
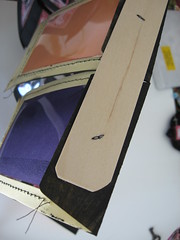
On the back (the unpainted side with the envelope flap), I measured an ATC-sized (2.5x 3.5") window in the center of the envelope. On this size envelope, it was 1-1/4" from top and bottom and roughly 3/8" from the sides. It doesn't have to be excessively precise.
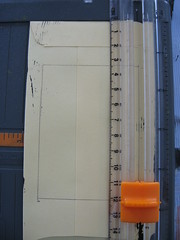
 Then I cut out this opening with my trusty paper trimmer. (Or use an X-acto and ruler instead.)
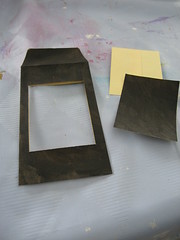
 Note that I cut through both the front and the back of the envelope, creating an open frame (and two scrap pieces that can be used to make ATCs). Be careful not to cut through the envelope flap.
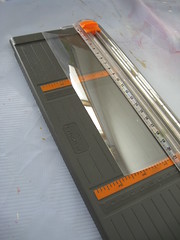 I had originally considered using regular trading card sleeves, but there wouldn't be enough overlap to attach to the envelope. So I made my own sleeves by cutting pieces of clear mylar roughly 3 x 8" (so they would be 1/4" larger than the ATC-size opening when folded in half). I know not everyone has giant rolls of 4 mil mylar lying around the house, but you can also use plain old photocopy transparency sheets from the office supply store. (Avoid the ink jet kind, which has a coating to hold the ink to the plastic, because I think that could rub off on your ATCs.)
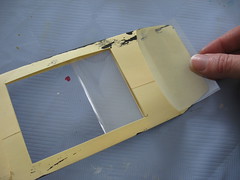
Once I folded my plastic strips in half, I slid them into the envelopes. Now conceivably you could just stop there and stick your ATCs in, but they'll probably slop around. I considered double-stick tape as an option, but maneuvering sticky strips inside the envelopes was just too fiddly for me. So my solution was to sew through all the layers of paper and plastic to hold the sleeve in place.
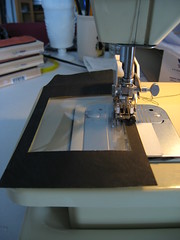 When sewing paper, remember to use a long stitch length or you'll risk tearing the paper once it's perforated by the needle. I gave myself a rough 1/8" seam allowance around the envelope window so there would be room to slide in thick cards. DO NOT sew all four sides of the window! Leave the top side (envelope flat end) open so you can slide your card in afterwards. (Don't ask me how many times I almost sewed the whole thing shut!)
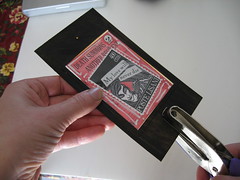
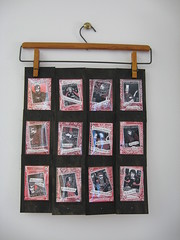
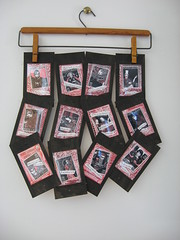
Once all the envelopes were finished, I decided to attach them together with little black brads (from the scrapbook supply section of the craft store). I tried to punch my 1/8" holes consistently at the center of each top and bottom section (above and below the window) of each envelope, so they'd all be interchangeable and hang fairly evenly. The display at the top of this blog entry shows everything hanging in portrait format, four columns & three rows, but they could be arranged in any way you wanted. I wanted to use this cool vintage wooden hanger that I had found at the thrift store, so I laid out my envelopes accordingly.
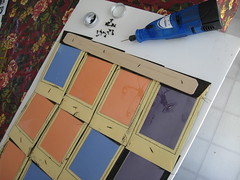
 I used one of those free paint stirrers from the hardware store as a support, drilling holes in it and attaching the top line of envelopes to it with more brads. Here's a few of the back of the envelopes (unpainted) with my yet-to-be labeled ATC backs showing though the "rear window." And below is the same set of envelopes as they're hanging in the living room now with some of my favorite cat ATCs collected from traders at ATCs For All and the Milwaukee ATC group. I punched holes in the long sides of the envelopes so they would match up with the holes in two of the short sides if two portrait-oriented envelopes were stacked above one landscape-oriented one. Make sense?
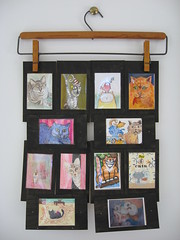
Click to see this image with all the artists noted.
So assuming you've made it this far, here are the problems I have with the project in its current format:
Because I didn't attach the open side of the window to the envelope, I sometimes had trouble sliding my ATCs between the plastic layers because they'd pop out between the paper and the plastic layers. This can probably be fixed with a bit of that double-sided tape I didn't want to use.
When changing out displays the little scrapbook brads can be fiddly (and poke under your finger nails *ouch*), but I'm probably only swapping my sets out every few months.
I wasn't very precise in my hole-punching so some of my envelopes hang cattywampus (no pun intended).
I'd be interested to see other people's takes on this project!


10 comments:
Oh wow...i'm so impressed...this is fabulous...a real work of art in itself!
This is very cool. Thanks for the step-by-step instructions!!
What an amazing idea and it looks fab too! x
What an intriguing idea - and beautifully explained! Thanks for the pics of the stages... and 'cattywampus' made me giggle!!
Rosie :0)
PS - I used 6 of mine for a different kind of project, but I can't share at the moment...
Thanks all for stopping by!
@ Rosie - can't wait to see your envie project too ;o)
This is such a cool idea.
Thanks for sharing that.
What a creative way to display your collection! Thanks for the steps ;)
If it's at all "catty wampus", you'd never know it. Personally, I think it's inspired! I'm going to try my hand at making one that is mounted on a small decorative rod I have (vs a coat hanger). I've also been looking for ways to display these mini masterpieces and you've given me some great inspiration!
Thanks, greer, Jenn & Cathy!
If you do make one, please leave a link here in the comments so we can all go see what you did :o)
Great project, thanks for sharing.
Post a Comment